|
This
tutorial will assume you have basic knowledge of WorldCraft3.3 (link),
however if
you dont, Ill try to be as basic as I can be when explaining the various
steps. If you do
need some extra info, like what a tool icon looks like or dont understand
some of the abbreviations or lingo, simply move your mouse over any
BOLD
type text or any of the
tools in the image to the right. On to the tutorial ...
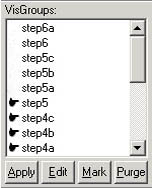
Firstly, launch
WC and open the file clifftut.rmf and take notice to the VIS
GROUPS .
All the steps of this tutorial have been placed in their own vis groups
for clarity. If any of
the other steps get in your way Simply turn the vis group(s) off. Also
notice the vis groups
that start with ViewingRoom these are the compilable areas. After
this tutorial Im
hoping that you will be able to create and modify terrain like this.
Step
B(eginning)
I started
here with a cube that is 160x160x16 (fig 1). The texturing doesnt matter,
I
only textured 1 side of this cube for clarity
through out the tutorial and to show that only
the faces that you want to show will show up.
Step I
Ok for the first step select your CLIP
TOOL and draw the clip line from corner to corner of your
solid cube (fig 2b). Press the clip tool icon 2 more times to enter
the 3rd mode
which should leave both halves white (fig 2a), thus simply splitting
the cube into 2 wedges.
Step II
|